Baza wiedzy
AVM Content
Connecting a FRITZ!Box set up as a VPN client (WireGuard) to another FRITZ!Box
When you set up an WireGuard VPN connection between two FRITZ!Boxes, by default both networks are connected to each other (LAN-LAN linkup). This way you can access all of the devices in the other network and all of the IP-based services such as email servers, databases, and file servers can be used at both locations.
However, you can also configure the VPN connection between the FRITZ!Boxes so that one of the FRITZ!Boxes acts as a VPN client. In this kind of client-LAN linkup, only devices in the network of the FRITZ!Box configured as a VPN client can access devices in the network of the FRITZ!Box configured as a VPN server. It is not possible for devices in the network of the VPN server to access devices in the VPN client's network.
You can find an overview of additional VPN connection options in our guide VPN with FRITZ!.
Example values used in this guide
In this guide we show you how to connect a FRITZ!Box as a VPN client via WireGuard to a FRITZ!Box as the VPN server. When setting up the connection, replace the values used in this guide with your actual values.
Requirements / Restrictions
- The FRITZ!Box which is used as the VPN server must either obtain an IPv6 address or a public IPv4 address from the internet service provider.
- FRITZ!OS 7.50 or later must be installed on the FRITZ!Box being used as the VPN server.
Note:This guide is valid for FRITZ!OS 7.50 or later. If you are using an older FRITZ!OS version, the configuration may differ or functions may not be available. You can find the FRITZ!OS version on the "Overview" page of the FRITZ!Box user interface.
1 Preparations
Configuring MyFRITZ!
With MyFRITZ!Net you can reach the FRITZ!Box being used as the VPN server from the internet at any time at its fixed MyFRITZ! address:
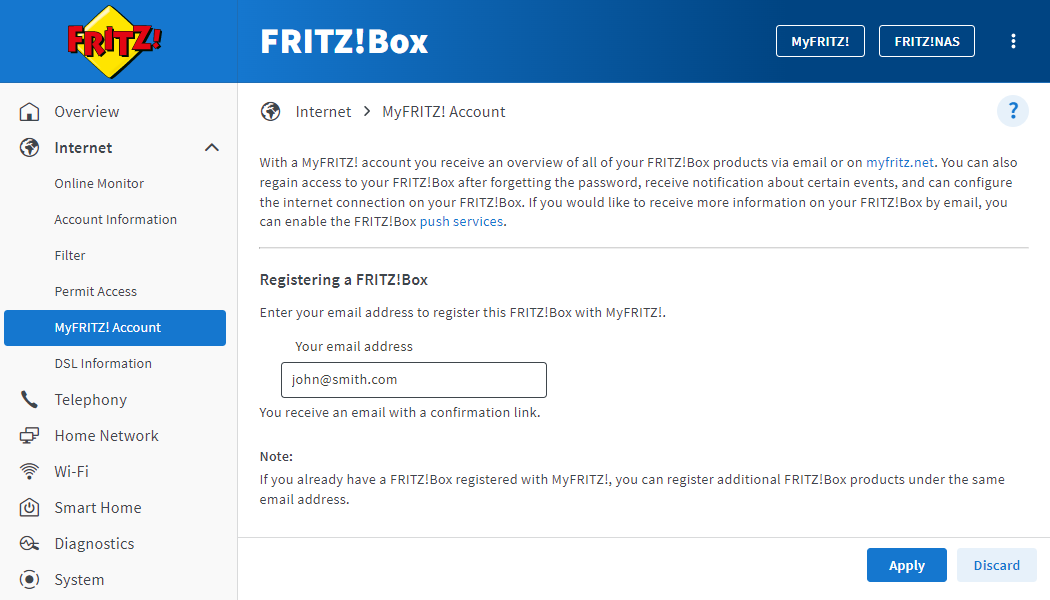
- Click "Internet" in the FRITZ!Box user interface.
- Click "MyFRITZ! Account" in the "Internet" menu.
- Enter your email address in the "Your email address" field.
- Click "Apply". Now MyFRITZ!Net sends you an email with the confirmation link to your FRITZ!Box.
Important:If you do not receive an email, the email was classified as unsolicited advertising (spam). In this case, check the spam folder of your email inbox.
- Open the email you received from MyFRITZ!Net.
- Click the "Register Your FRITZ!Box" button in the email.
Adapting the IP networks
VPN communication is not possible if both FRITZ!Boxes use the same IP network. Since all FRITZ!Boxes use the IP network 192.168.178.0 in the factory settings, adjust the IP network of the FRITZ!Box used as the VPN server:
Example:
In this guide, the FRITZ!Box used as the VPN server uses the IP address 192.168.10.1 (subnet mask 255.255.255.0).
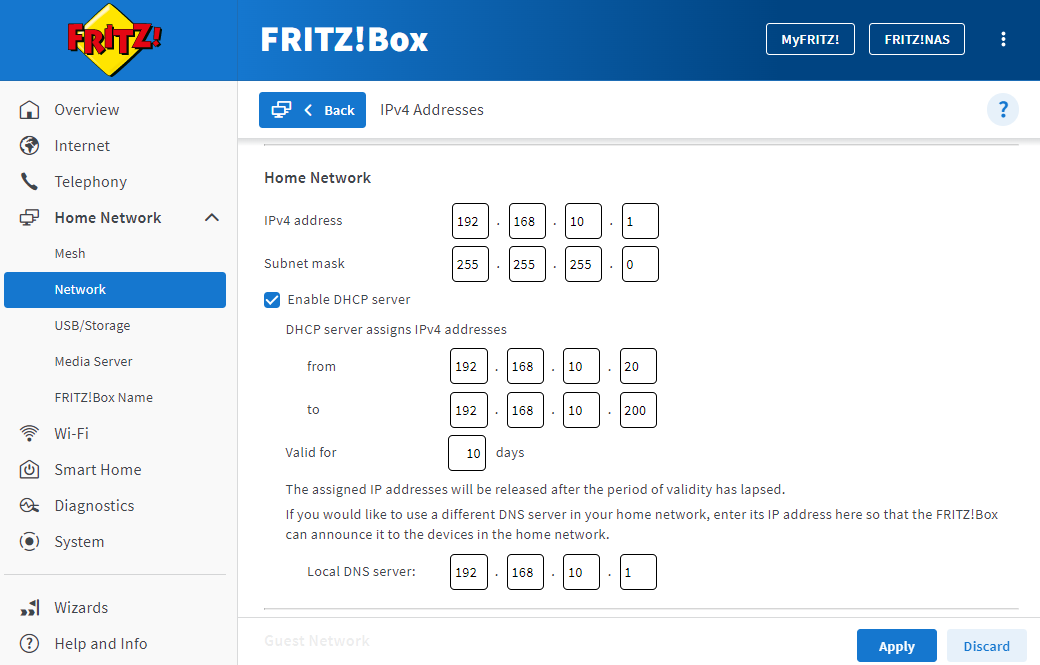
- Click "Home Network" in the FRITZ!Box user interface.
- Click "Network" in the "Home Network" menu.
- Click the "Network Settings" tab.
- Click "Additional Settings" in the section "LAN Settings" to display all of the settings.
- Click the "IPv4 Settings" button.
- Enter the desired IP address and subnet mask.
Important:Do not enter an IP address from the network 192.168.100.x. In compliance with DOCSIS, this network is reserved for the cable provider and may not be used in the FRITZ!Box.
- Click "Apply" to save the settings and on the FRITZ!Box, confirm that the procedure may be executed, if you are asked to do so.
2 Setting up the VPN server
- Click "Internet" in the FRITZ!Box (VPN server)user interface.
- Click "Permit Access" in the "Internet" menu.
- Click the "VPN (WireGuard)" tab.
- Click the "Add Connection" button.
- Click "Connect a single device" and then "Next".
- Enter a name for the VPN connection (for example FRITZ!Box VPN client).
- Click "Finish".
- If you are asked to do so, on the FRITZ!Box confirm that the procedure may be executed and click "OK" to complete the procedure.
- Click "Download Settings" and download the file with the extension ".conf" to the computer.
3 Setting up a VPN client
In the FRITZ!Box to be used as the VPN client, set up a VPN connection to the remote FRITZ!Box:
- Click "Internet" in the user interface of the FRITZ!Box (VPN client).
- Click "Permit Access" in the "Internet" menu.
- Click the "VPN (WireGuard)" tab.
- Click the "Add Connection" button.
- Click "Connect networks or establish special connections" and then "Next".
- By "Has this WireGuard connection already been set up at the remote connection?", click "Yes".
- Click "Next".
- Enter a unique name for the connection (FRITZ!Box VPN server) in the field "Name of the WireGuard connection".
- Click the "Choose File" or "Browse..." button.
- Select the settings file for the WireGuard connection that you downloaded from the FRITZ!Box (VPN server) and click "Open".
- If you do not only want to use the VPN connection to access the remote network, but also want all web requests to be sent over the VPN connection to the FRITZ!Box (VPN server), enable the option "Send all network traffic via the VPN connection".
- Enable the option "Allow NetBIOS over this connection" if access to Windows file and printer sharings (SMB shares) in the remote network should be allowed.
- Click the "Finish" button.
- If you are asked to do so, on the FRITZ!Box confirm that the procedure may be executed and click "OK" to complete the procedure.
Now the VPN connection between both FRITZ!Boxes is configured and the FRITZ!Box (VPN client) is permanently connected to the FRITZ!Box (VPN server).
 Deutschland
 International (English)
 België (Nederlands)
 Luxemburg (Deutsch)